
Are you looking for a clear overview of your business’ finances? By downloading the ultimate QuickBooks chart of accounts template Excel spreadsheet file, you’ll make managing your finances easier than ever.
This allows you to track all the money moving in and out of your accounts. A list of charts are the backbone of your accounting system and will help ensure your bookkeeping stays accurate.
We’ve included a downloadable chart of accounts template for QuickBooks Desktop ready for you to personalize with your own company file info. This can be done by manual data entry or copying and pasting from another document.
Keep reading this guide to learn how to:
Need a CRM for QuickBooks?
How to import chart of accounts into QuickBooks Desktop from Excel
Your charts of accounts is a comprehensive list of accounts and balances in your business. You can use this list to:
- Simplify your financial reporting.
- Track debts.
- View your cash flow statements.
You can import chart of accounts into QuickBooks Desktop from Excel files, or with a CSV file type.
Before you begin your import, you will need to make sure that the account types listed under the “Account Type” column header are one of the following.
- For balance sheet accounts:
- Asset, Current Asset, or Fixed Asset (major purchases).
- Bank.
- Credit Card.
- Equity.
- Accounts Receivable A/R.
- Accounts Payable A/P.
- Other Current Liability or Long Term Liability.
For income and expense accounts:
- Income or Other Income.
- Expense or Other Expense.
Now, here’s how to import charts of accounts into QuickBooks Desktop:

- Navigate to the top menu bar and select “Lists,” then “Chart of Accounts.”
- At the bottom of the screen, click the tab labeled “Account,” then select “Import from Excel.”
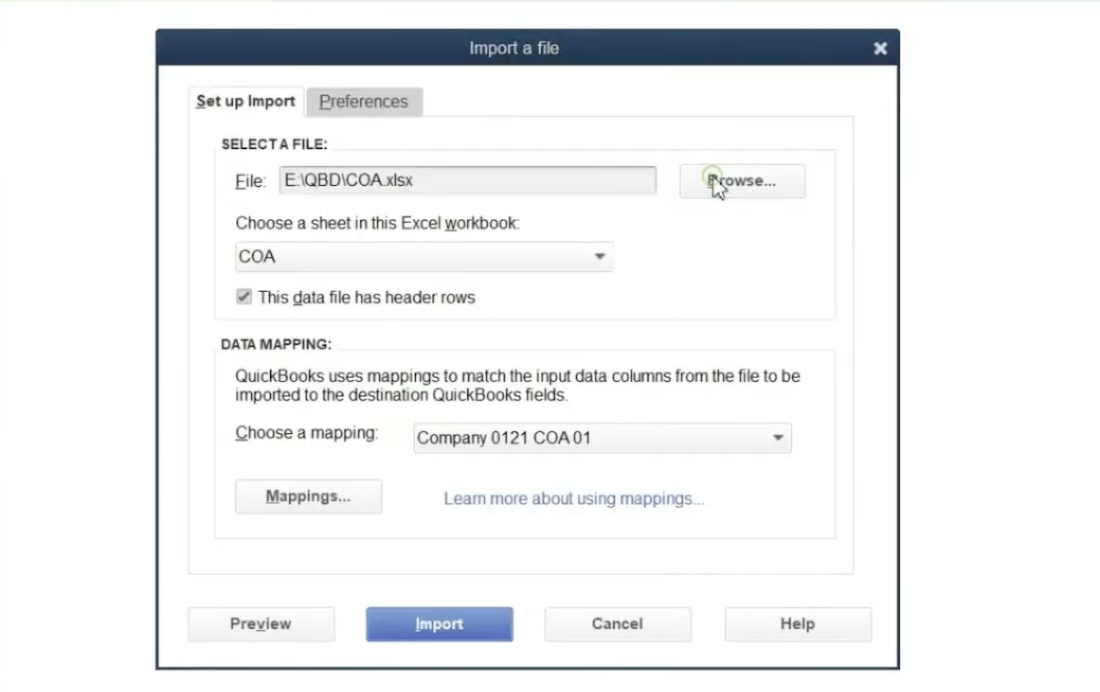
- In the new window, select “Browse” and navigate to where your Excel chart of accounts is located on your computer. Select your Excel chart of accounts file and click “Open.”
- Click the drop-down menu under “Choose a sheet in this Excel workbook” and select the name of the tab in your Excel workbook that has your chart of accounts.
- Make sure that the box marked “This data file has header rows” is checked.
- Click the bar to the right of “Choose a mapping” and select “.”
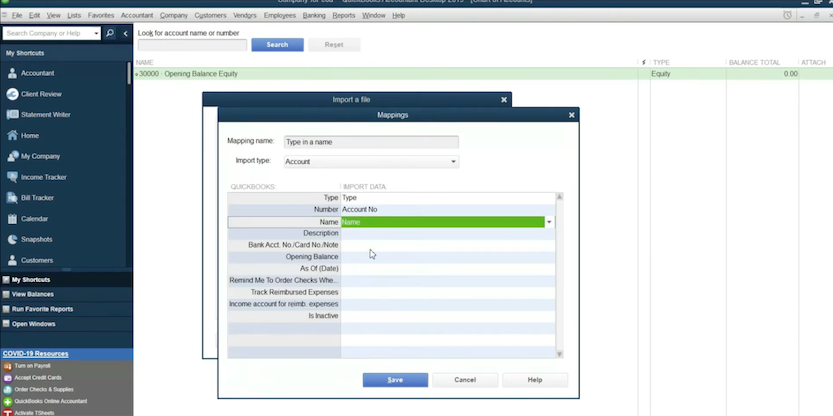
- A new “Mappings” window will appear, where you need to ensure your column headings are the same in your Excel file as what’s listed in QuickBooks. For example, if you have a heading called “Type” in your Excel spreadsheet file, then you will need to select “Type” in the “Mappings” window in QuickBooks.
- In the text box labeled “Mapping name,” enter a unique name for organizational purposes.
- When you have finished mapping your QuickBooks chart of accounts template Excel file headers, click “Save.”
- Click “Import” and then “Yes.” You may need to close your Excel workbook before you can continue.
- If you receive a notification that prompts you to save an error log from the import: click “Save,” choose the location on your computer where you want to save the file, and click “Save” again.
And that’s it! Your imported chart of accounts is now visible in QuickBooks Desktop.
